Friday 27 February 2015

The Snazzies: Slinky Initial Turnaround

Hey Catherine,

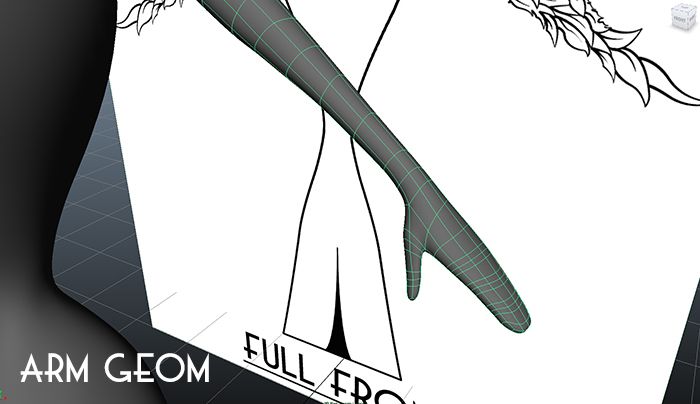
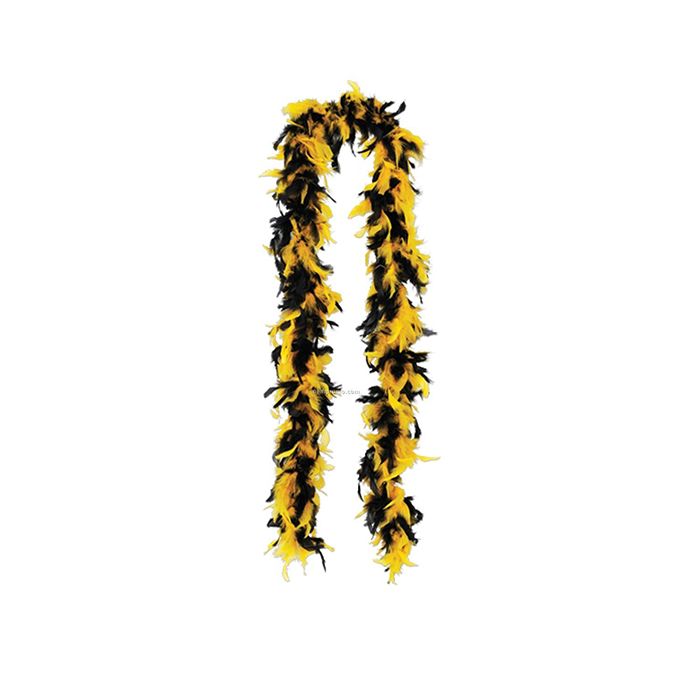
This is another post for you to examine and please do so carefully. At this point the model is nearing completion I just need to texture and rig it but this is the point where you can change the shape. Take the weekend and show it to some people and please do your best to ignore the arms (the feathers is something I'm playing with). You won't see the arm geometry underneath but it needs to be there so they can be animated.

The turnaround above is the model at its core and the geometry underneath, its professional to be able to show both. Anyway this should allow you and anyone you show it to examine the models form and decide if the shape is acceptable. This is the only stage where things can be adjusted because once rigged there will be no going back without a re-rig... and that's extra. Rigging is a fussy thing so geometry has to be as is.

Let me know!

xXStItChXx

Thursday 26 February 2015

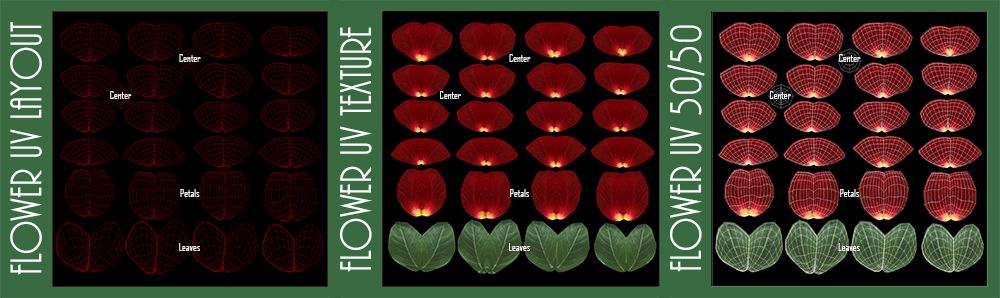
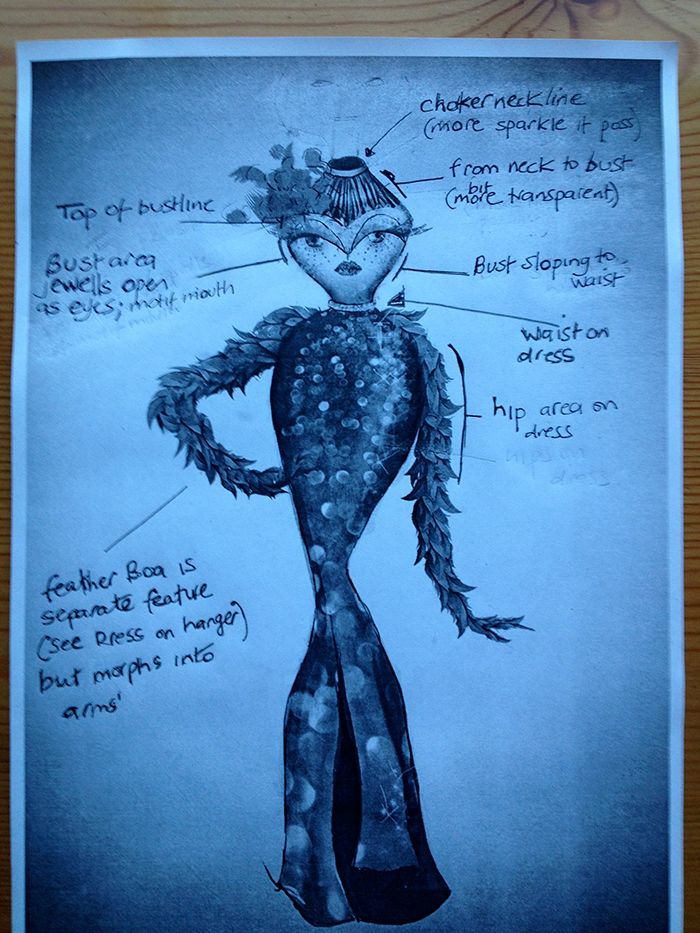
The Snazzies: Slinky Model Details

Hey Catherine,

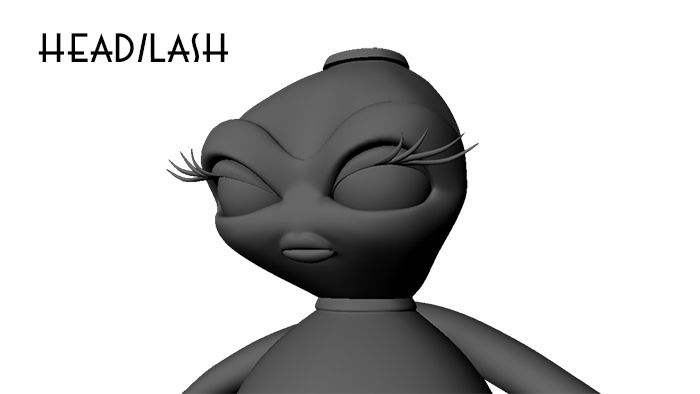
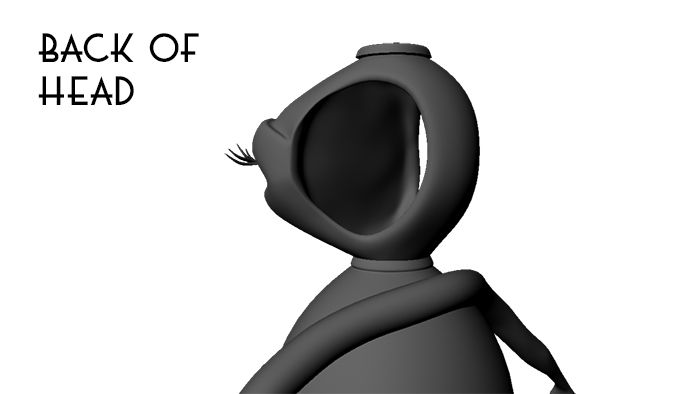
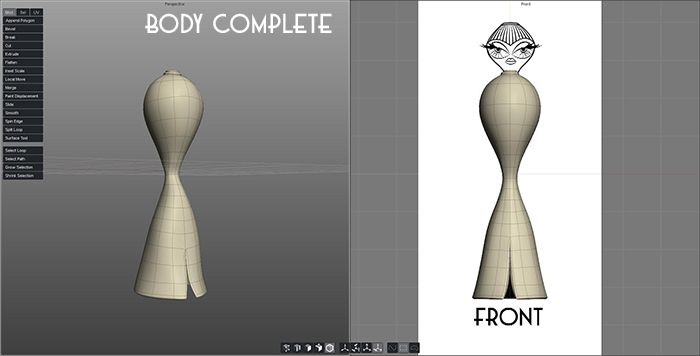
The model is coming along really nicely so I wanted to show you some bits of it, I will also explain some of the more intricate parts which we discussed on the phone. We are going to start with the head region as that is where most of the detail is. We can then move on to the arms which have been modelled they now just need fur. I'm working on that next then the texturing which won't take long.

Okay as far as the head goes it has a mouth box I wasn't sure if you wanted the model to have teeth or a tongue so let me know. I can probably wrap the lashes to the eyes or possibly parent them to the eye lid joints... we will see. The button eyes I thought it was best to make them in the texture as any protruding buttons will make the eye blink weird. It's not a big deal you probably wont notice.

Next is the back of the head which I mentioned to you on the phone. I gave the front of the dress an interior back which had to go back a bit to accommodate the eye balls and the mouth box. If you don't want to see the back of the eye spheres or mouth box you have to have something that hides these features. It's just to make the model more sleek and allow you to use it from the back should you need to.

The next picture is about the arms and their geometry which need to be in specific places to allow the arm to fold and fingers/thumb to bend accordingly. The arms are connected and drape over the neck of the model as in your diagram I assume it acts like a waist wreath. The only thing this needs now is to get the right kind of feather/fur I will be on that next the texturing won't take long either.

That's what the model looks like against the planes you can see I followed the diagrams as closely as I could the only thing missing is the feather fur and of course the hair accessory. I've kept the hair detail off for now because this is when you need to decide if the shape of the model is acceptable. As I said before this is the only time when you can change the shape so please make sure your happy.

xXStItChXx

Thursday 12 February 2015

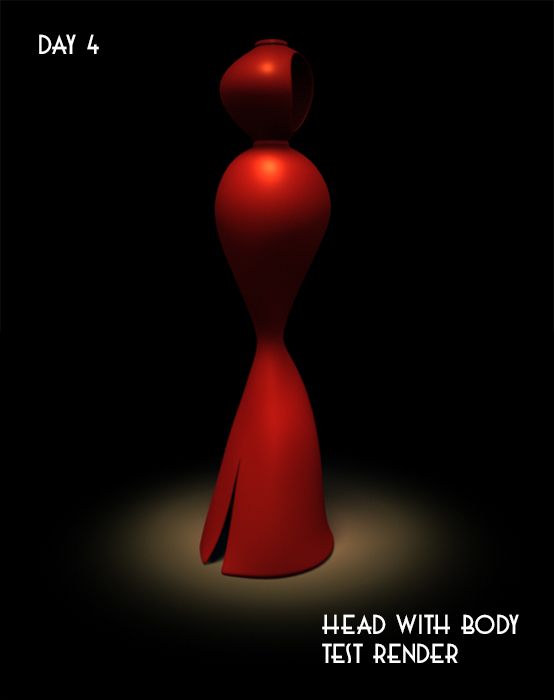
The Snazzies: Slinky Model Day 3 & 4

Hey Catherine,

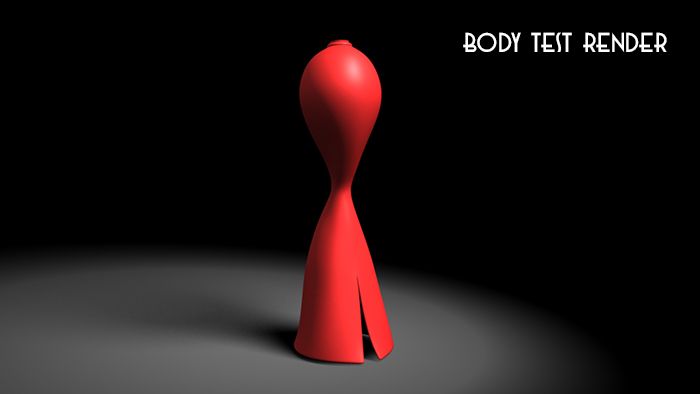
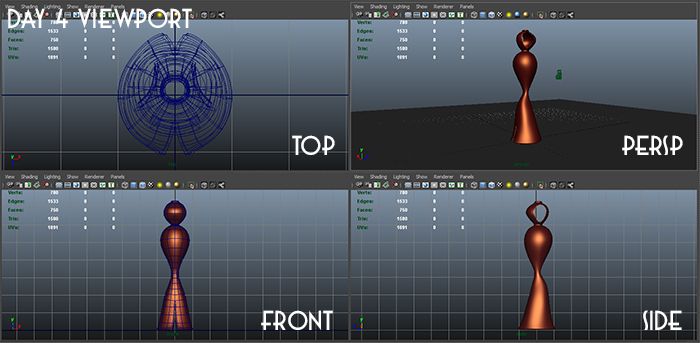
I decided to keep updates to 2 screens per day so the posts will be every 2 days, it's just easier to keep things in check. That being said I will aim to have this model done by next week, I'll start looking at texturing too but you may want to weigh in here. I'm not sure if you have a dress design/pattern that you would rather I use... Please let me know.

Day 3 was mostly the finalisation of the shape of the body (tweaking can be done after I have the whole model). As you mentioned in your email the shape may need to be adjusted to your desire or not but please don't hold back if there is something that you don't like. We can look into this after everything is built. I think it's getting there.

I took the body into another program to do some test renders... just to see how good I could get it to look with shaders alone. The texturing process will make all the difference (as it did with the rose). I can get subtle deformation and hopefully get some nice stitching style patterns or dress fabric or the sequence pattern on your concept. Please let me know about textures.

This shot is from Day 4 basically I fleshed in the head of the dress, things look like there coming together now. I also played with the shape a little more based on what you said. I didn't want to change it too drastically as I said after the model is made I'll post up a turnaround so you can see every angle. It's quite handy to see the entire outcome before making a decision.

Last but not least I sat down and did another lighting render with the head and a slight tweak on the lighting setup. Anyway these are the developments to this point, I think the dress is coming together now that it has a head. I think the eyes will complete the situation... Everything else is going to be the work of the textures... The arms will be the last thing I probably do.

Okay hope you like it so far!

xXStItChXx

Wednesday 11 February 2015

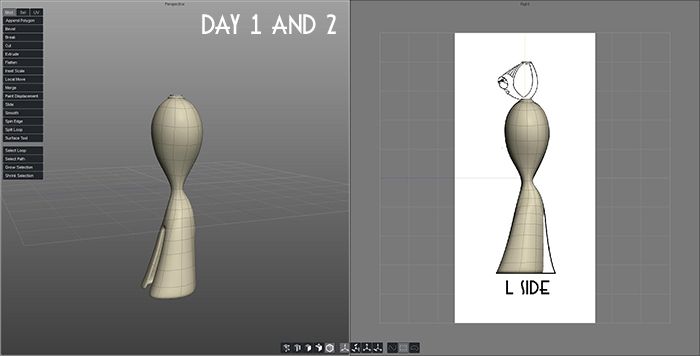
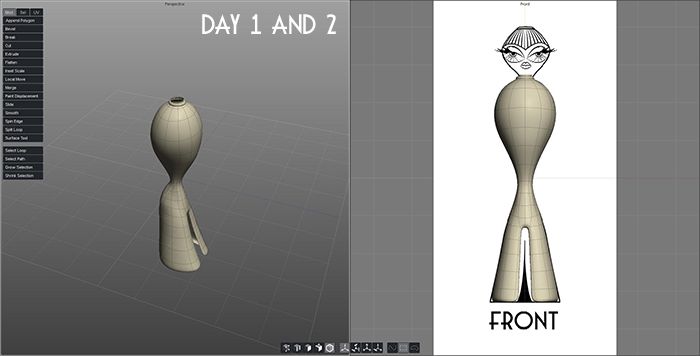
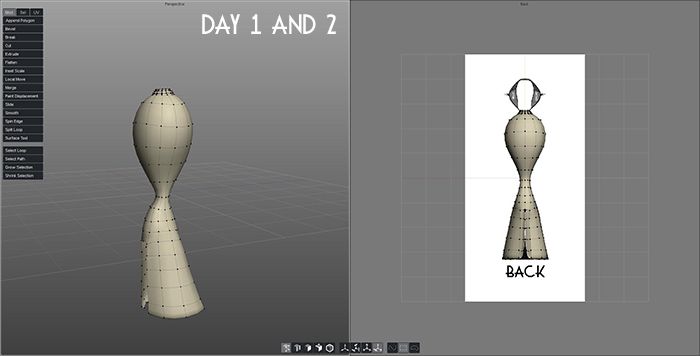
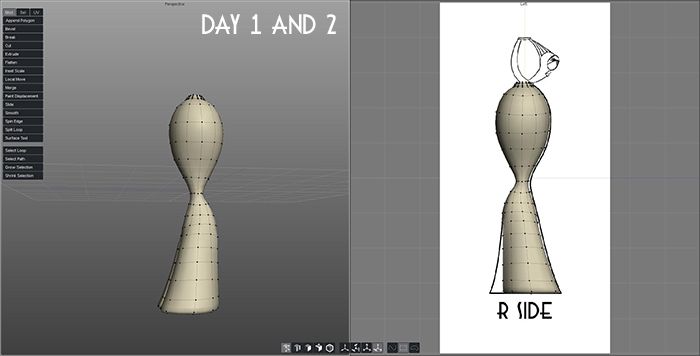
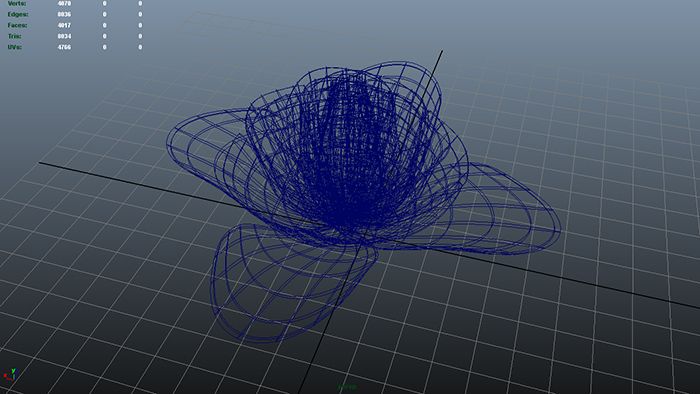
The Snazzies: Slinky Model Day 1 & 2

Hey Catherine,

So sorry i'm late on here was up late last night playing with the model a bit so delayed my sleep this morning... I'll never learn but when I start modelling I kinda get tunnel vision and don't know when to stop. Still I am bringing you a few dev shots as promised. I started the model a few times but the geometry wasn't right and you need it to be if you want it animated properly.

Anyway I will give you a shot from each Orthograph profile and to the left of each image is the body in perspective. It's coming along quite nicely I'm just this second trying to get the slit of the dress correct. The head is gonna be a bit of a challenge but I'm confident that once I get started there won't be too many issues...

Shot 2 shows the front as you can see its all lining up quite nicely but the reason I keep perspective in play here is because the Orthographs sometimes have a way of making characters look wrong in places or the geometry doesn't lay out how it should. For this reason I go into perspective and tweak things so it looks good in the view you will be using it in for your v-logs.

Next is the shot of the back which as I mentioned in the first shot the slit is the next thing to figure out, I have to do it in a way that the rigging doesn't may the dress appear in the correct way... I may take it into another application to do this. The dress needs a back side on the inside otherwise it will look as though the dress is transparent when you look inside.

Last but not least is the other side shot from the right side. So far everything lines up but that's probably going to change especially when I get to the head. You don't want the body leaning forwards really. The back of the dress is the next step for me so don't worry I'm still shaping the body of this dress... Rest assured though everything is totally under control. I hope you like how its going so far... Sorry it took so long to get in touch today.

xXStItChXx

Sunday 8 February 2015

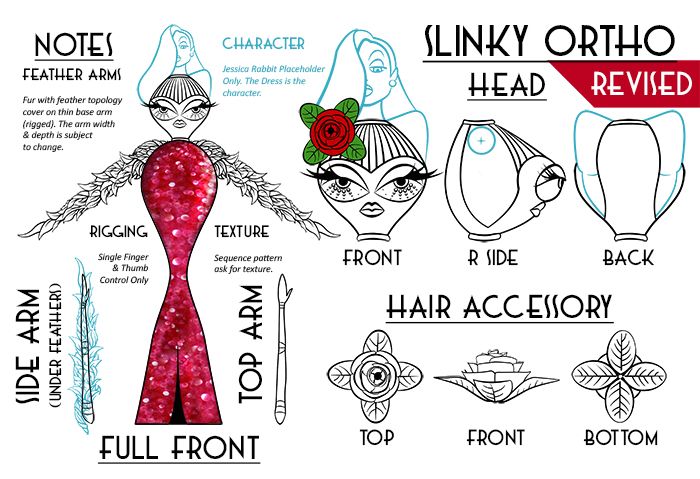
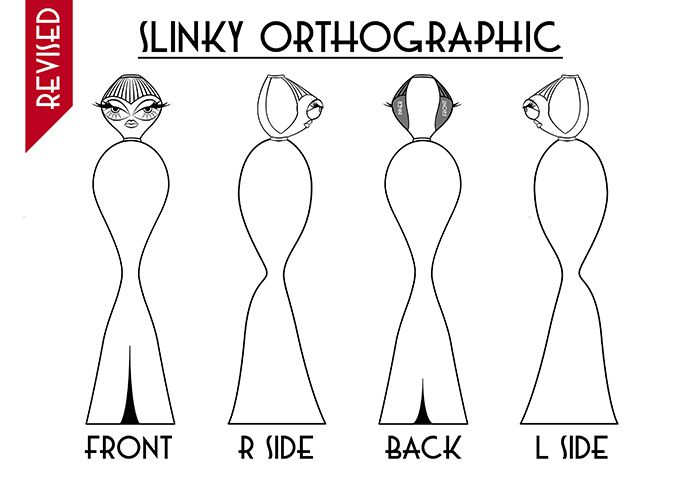
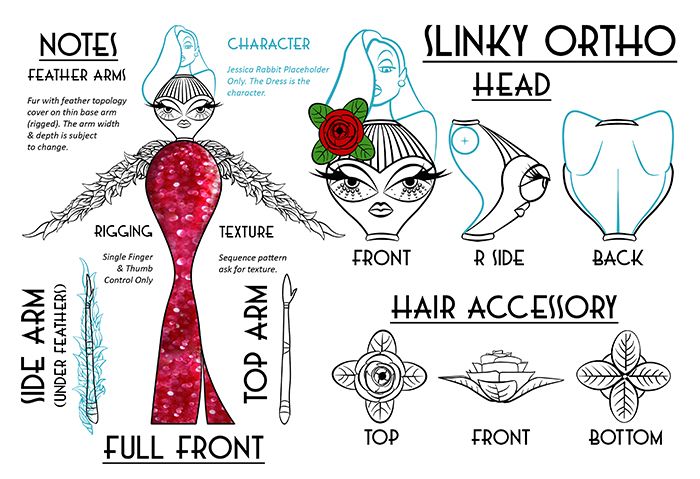
The Snazzies: Slinky Accessory & Orthograph Revisions

Hey Catherine,

I am back on the case, everything has been sorted and yeah I found a few hours for myself over the weekend... Adjusted your turnarounds so once you confirm them I think we are ready to go... I also adjusted the rose leafs... much sharper so this should be the last post regarding the two. Please let me know if these are acceptable so I know everything is good to proceed.

The revised upper body diagram shows the side and back head's of the slinky, I also changed the dress shape to be more even on each side especially now that I know the slit is just on the front and back which means it doesn't show on the side at all really... at least not in orthography... it would in perspective. Anyway this should be more like what you wanted.

As far as the full body images go like I said before I made the bottom of the dress frill out a bit to match it more to the side profiles. When adjusting the sides I gave the dress a little curve of elegance around the back... I thought it would make it more effeminate. I added your front and back slits and as you can see the dress has a back...

The last item up for discussion is the rose did my best to sharpen the leaves and I can sharpen them more but I will have to do more playing with the geometry... Just let me know if they are not sharp enough Ill see what I can do... Although you may want to consider that when I smooth the rose it naturally turns right angles into sharp curves... nature of the business unless you want things low poly.

Anyway I hope these are acceptable.

xXStItChXx

Monday 2 February 2015

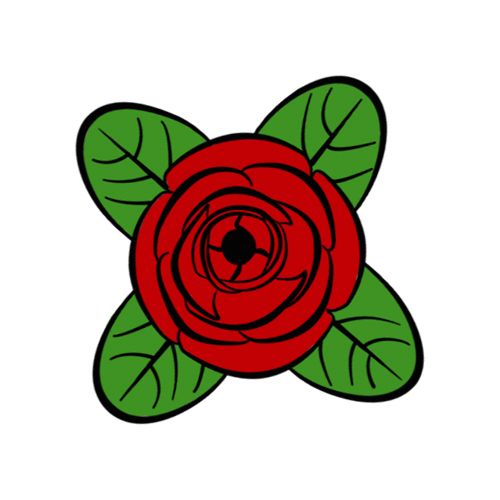
The Snazzies: Slinky Hair Accessory

Hey Catherine,

Got another little update for you, I spent a few hours this weekend playing with the hair accessory for your slinky. I knew it was a rose (as is the name of the Slinky in question). Anyway I sat down and got that bit out of the way being one of the most intricate pieces about the model. As you can see from my prior post Orthographics, I had planned it but wanted your feedback.

The image above was my top down estimation of a rose, for this I had to do a bit of research into Roses, this is the first flower I have tried to create in 3D so I hope it makes the cut. Please let me know if there is anything missing or if there is anything you need me to add... Imagery would be better then words so I know what I have to recreate.

The image above is some of the development work which I told you I would post if you wanted. This particular one is a UV map and its what us modellers use to give their model colour, texture and definition (bumps, displacement, etc). This grid is the squares that constitute the model and the petals are draped over them to give the flower elements realistic colour.

The image above here is the wire mesh view of the rose model showing the grid which is textured and built within 3D. The model is fairly basic but it has a lot of individual detail, the rest is created by the rendering engine and lighting effects. Anyway all of this produces a final renderered image... see below!

As you can see the rose looks pretty nice but it does have some very specific lighting and texture settings. These may change depending on your future animators setting, if you want at the end of this I can give you some recommendations... either way its up to you. Anyway I hope you like the look of this, please let me know if I have overlooked anything but I do ask that you consider how intricate flowers can be... Too much detail can make animation a chore.

xXStItChXx

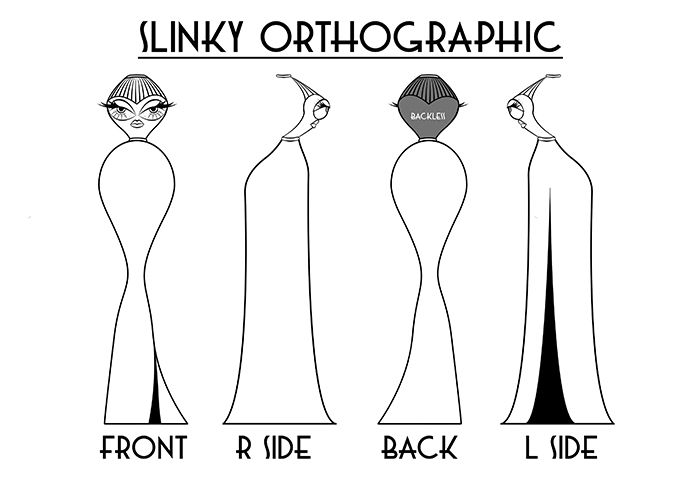
The Snazzies: Orthographics Dev Slinky

Hey Catherine, 
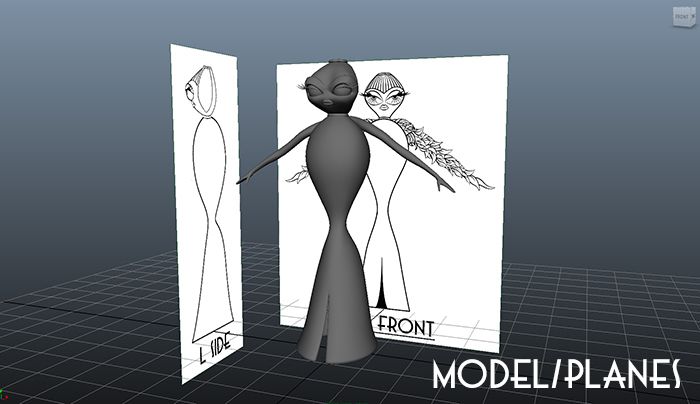
Sorry I have been quiet, I tend to do that when I am in full on work mode... rest assured I have been working away on stuff regarding the Snazzies. As I explained in my last post/emails Orthographics are generally a must for any 3D based work where a concept or design is already forged. It's took a little longer then I would have liked but I am happy with the results. Anyway lets get down to the nitty gritty.

I worked very closely with the blueprint image above that you gave me and considered the entire character + all elements from multiple viewpoints. I am going to work my way through the slinky and then do the same process with the saggy when the slinky is complete... From what I have seen the saggy will be easier, I had to consult a colleague about the Slinky - particularly the feathered arms... I have found a way though.

The image above shows the orthographics I knocked up, please take a careful look at these because these are what I will be using to create your 3D model. After these have been confirmed I will get cracking on the modelling. These will help me create the base shapes and then further alterations on the model can be discussed... Ill do a daily post for the modelling phases.

These are the orthographics I will be using for the body shape, I added a slit because I could see that in your original I also added a waist on the side because the hips of the dress concept you sent give the illusion of a woman filling them. I also assumed the dress is backless (another thing I considered from the Jessica Rabbit suggestion, let me know if not).

Last but not least this is a picture I found, looking similar to your waist wrap thing, I just wanted to make clear that this is how you want her arms to look... I'd also like to confirm from one of your earlier emails that you don't want a thumb or fingers in this? You just want mobility... Once you confirm these designs I will get cracking with the modelling phase. then texturing and lastly rigging...

xXStItChXx