Hey Catherine,
Okay this is the UV Mapping post so I'll warn you know this is a bit technical but I'll do the best to explain. Basically UV Mapping is what allows us to place textures on otherwise simple shader models. It allows us to literally paint our model with textures or polypaint if we so choose. Its essentially painting on a 3D surface... we paint flat in 2D but the dimensions of the model make it 3D.
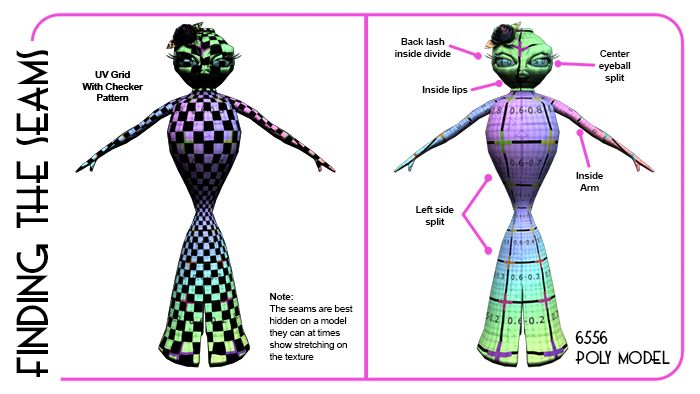
Probably one of the most important aspects of UV Mapping is seam placement. The seams of a model are areas which can pull or partially distort our 2D textures. So we have to place them in locations where they will mostly be ignored: Under an arm, on the very edge of a leaf, down the side of a dress. Places where the eye will not look for them. If the UV Mapping is done right they cause minor problems but placing them is still a key process.
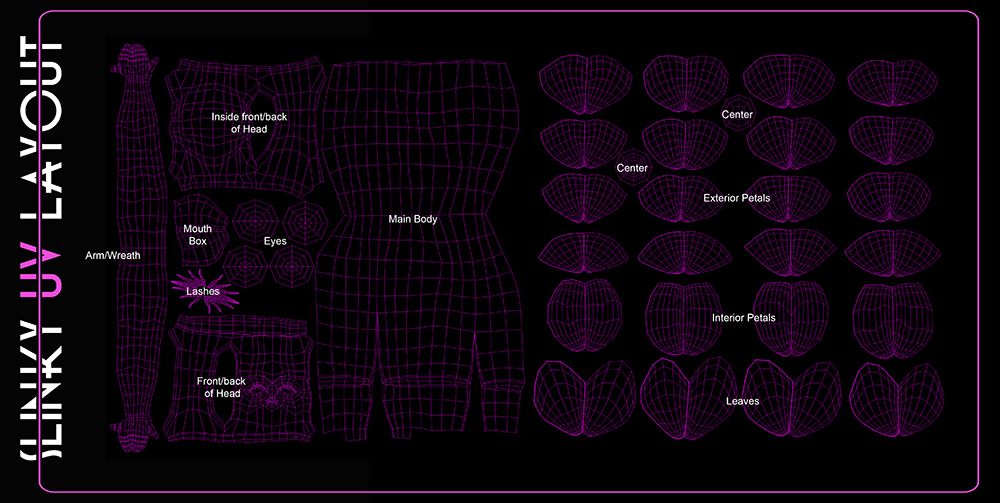
Above is the UV Layout of the entire Slinky model. The UV Layout is a reference grid created by our model defining the surface where the artist is to paint or texture. We break these up to make it easier to know what we are painting. Where the models are broken is essentially where a seam is and like I said placing them on crevices or sharp edges is the best place if possible. If it isn't try to place them where they cannot be seen.
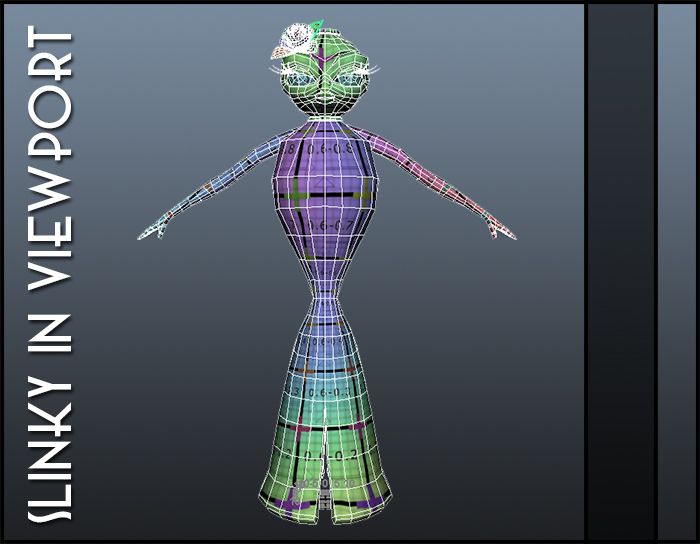
The image above shows the Slinky in the viewport of our 3D program Maya 2013. I have placed a UV Grid over the model to show me how the model distorts the model if any. This can also be done using the checker texture. These basically help us diagnose any problems within the texturing. A model with minimum distortion will paint with the slightest abnormalities. The z dimension of the 3D model will make our flat textures 3D.

Last but not least the animated gif above shows the models and their seem distortion from a 360 degree turnaround. From this you can see slight interruptions in the checker and layout patterns. These are essentially where the seams are placed, hidden from immediate viewpoints (like the front of the model). As I stated previously the textures are flat the model and its shaders/lighting are what give the character dimension.
Hope I didn't get too technical but I just thought you might like to understand it a little.
xXStItChXx

No comments:
Post a Comment